
Data reconstruction comparable to your acquisition image
Attention! This new feature, available in CIVA 11, potentially allows great things! When you perform a simulation with CIVA, the model (geometry and material of the test piece, probe, flaw, etc.) is as close as possible to the actual configuration. For example, if you describe a component with an anisotropic cladding, you define the test piece with the two layers and you take care to define the anisotropic properties of the cladding. Once the calculation is done, CIVA allows you to reconstruct data in the coordinate system of the work piece accounting for anisotropic properties of the cladding and thus implicitly the resulting beam deflection. So you get a very accurate repositioning of indications, which lets you know exactly what the position of the defect is.
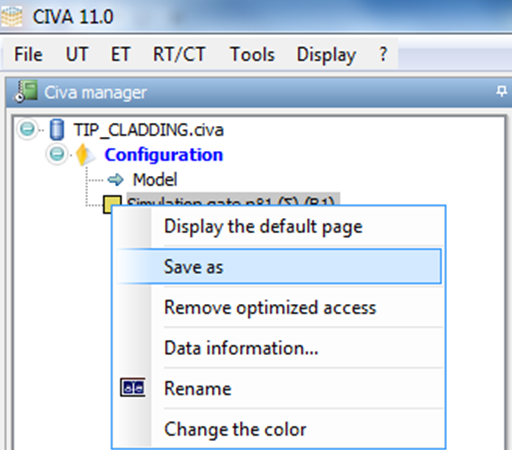
However, when you make the inspection of the real piece exhibiting the cladding, most acquisition devices or analysis software do not allow you to set the parameters as completely as what you can do in the CIVA model. Thus, the reconstructed image that you get does not take into account the anisotropic cladding, and the positioning of defect indications is wrong. It may be interesting to use CIVA to highlight the difference due to the cladding, and obtain by “degrading” the CIVA model a reconstructed image comparable to what you get on your acquisition system. To do this, simply right-click on the data source of your original file (containing the complete model) and select “Save As.”
You can then reopen the saved file, which is now interpreted by CIVA as an “acquisition” file, in which it is possible to modify the model parameters and apply the new parameters without having to run a new simulation. In our example, we simply modify the material of the cladding to the same material as the rest of the test piece, and press the “Apply” button at the bottom right of the 3D visualization window.
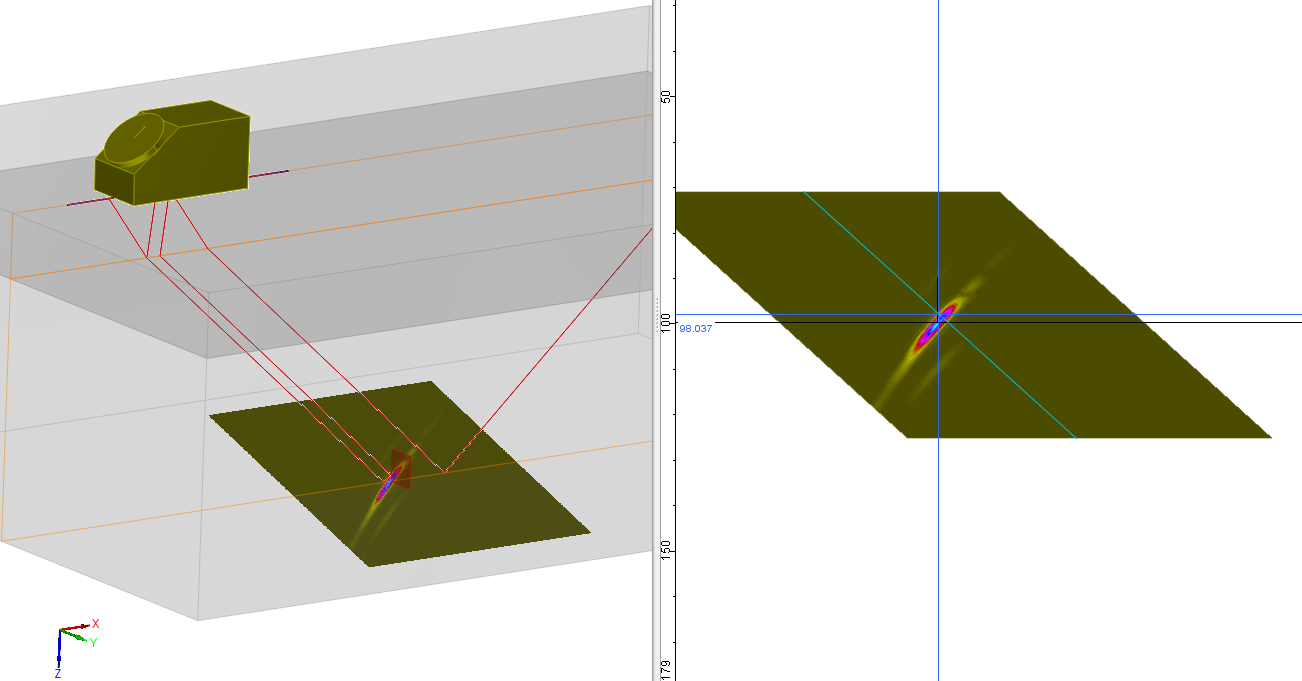
Finally, when you open the reconstructed Bscan image and display it in the 3D view, you get the picture below which no longer reflects the influence of the cladding.

This trick will enable you to be able to easily compare an image obtained during an acquisition with the CIVA reconstructed image under the same conditions, while having done the calculation with a specific model as close as possible to real conditions. This example demonstrates the advantage of this capability. It can be applied in many cases, what is the impact of an inappropriate delay law? A specific geometry not taken into account? An attenuative material or deflection of the beam? We trust you to use this feature and utilize all the benefits from it.